Jump to video!
My Mother-in-lay's Famous Chinese New Year Classic
This is my mother-in-law's famous turnip cake recipe that she makes every Chinese New Year, and they are the best I've ever had anywhere, fancy Chinese restaurants included.
It's so good that I made it a mission to immortalize this recipe into a YouTube video
because I do not want this to ever get lost, and I want my son to be able to recreate it when his grandma is not around to make it for him.
As with most recipes from our mothers and grandmothers, there isn't much written down, so I insisted on filming her making it so as to not miss any details. Thankfully she had all the ingredient amounts written down, so I just had to make sure I got the process right!
What is a Turnip Cake?
If you've never had this, it may not sound super appetizing. But trust me, with the addition of dried shrimp, scallops, Chinese sausage and shiitake mushrooms, this is one of the most umami-filled comfort foods. There's a reason why it's a classic!
Turnip cake, or "lo bak go" in Cantonese, is sometimes called Chinese carrot cake, which is bizarre because it doesn't involve any turnip or carrot! It should actually be called a daikon cake because daikon radish is the main ingredient. It's also not a "cake" like a chocolate zucchini cake. It's just...cake-shaped.
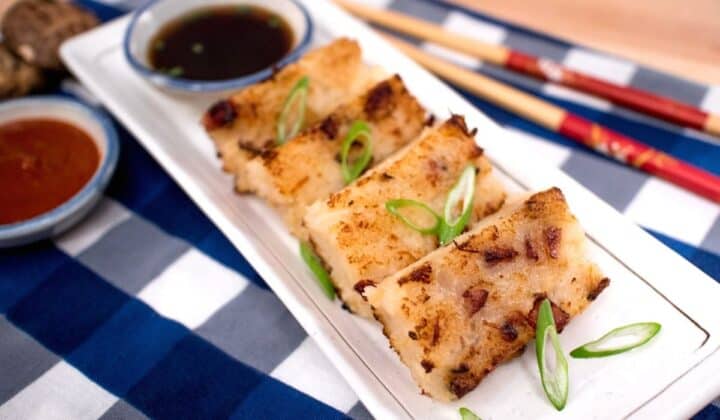
How to Eat/Serve Lo Bak Go
The most classic way to eat turnip cake is to slice the chilled cake and pan sear them until browned, then served with hot sauce and soy sauce.
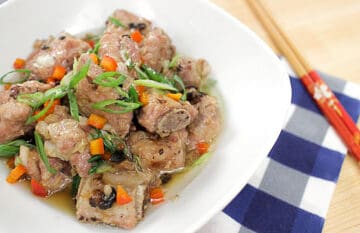
But you can also cut them into cubes and stir fry them. A favourite of my in-laws' is lo bak go cubes stir-fried with XO sauce and beansprouts. My husband loves cracking an egg into the pan while pan frying them, then scrambling everything together.
Also, even though it is a Lunar New Year classic, it can be eaten anytime and you can get it at any dim sum restaurant year round.
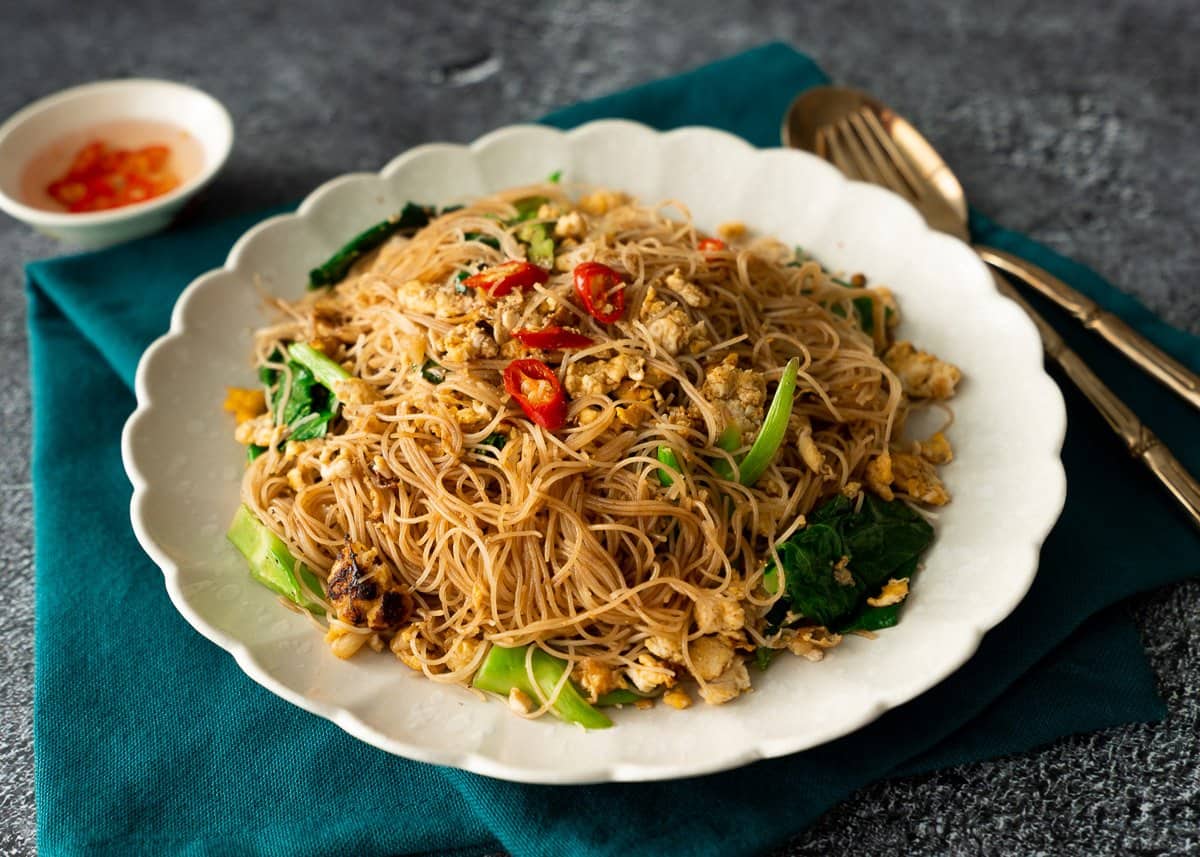
How Thai People Eat Turnip Cake
My FAVOURITE way to eat it though? The Thai way, of course! In Thailand, we always stir-fry it with beansprouts, garlic chives, and eggs, and it is called called kanom pakkaad
. Check out my recipe for Thai-style stir-fried turnip cake recipe here.
Where to buy all these dried ingredients?
The dried shrimp, scallops, mushrooms, and Chinese sausage are absolutely key to this recipe. They're the reason this tastes like an umami-filled delight rather than a lump of steamed radish. The scallops are optional, but keep at least 2 of the dried ingredients below.
- Dried shrimp:
You can find dried shrimp in the refrigerated section of an Asian grocery store; medium or large sized one work fine.
- Dried shiitake mushrooms:
These are also readily available in the dry goods section of any Asian grocers, and for these I prefer to choose ones that are not too large, so they will rehydrate faster.
- Chinese sausage:
Can be found in the refrigerated section, and make sure you choose the all-pork, fatty ones rather than the leaner looking ones with chicken or liver mixed in. Some brands are saltier than others, so keep an eye on the sodium content if this is a concern.
- Dried scallops:
Your Chinese grocery store may carry them, but I get them from Chinatown at one of those stores that sell a whole bunch of dried products. They are pricey, but you really don't need a lot, and there's no need to get large ones which are more expensive. And yes, you can omit them.
Storing Turnip Cakes
You can keep the cakes in the fridge for up to a week, and fry them up whenever you want to eat.
You can also freeze them, but slice them BEFORE freezing so you can just thaw what you want to eat.
To delay freezer burn, wrap the cake in foil before placing them in a freezer bag. Let them thaw at room temp, or in the fridge overnight, and fry them up as usual. I find the texture to be a tad softer after frozen, but still perfectly fine.
The Most Common Problem and How to Prevent It
Most people have made this recipe successfully, but by far the most common issue is that the cake comes out too soft.
Here's how to make sure it does not happen to you.
- The amounts or liquid, flour, and daikon in this recipe is EXTREMELY important in getting the right texture. Do not eyeball or estimate any ingredients
. Also don't Google grams-to-cup conversion for the rice flour; it's not accurate. Get a kitchen scale,
they're super useful and inexpensive, you will not regret buying it.
- The amount of daikon called for is the weight WITH skin
. So you will remove the skin after peeling it.
- Make sure you press out as much liquid as possible from the daikon.
- If you're making a bigger batch or using a different shaped pan that makes the cake thicker, it will take a longer to steam. If you've let it cooled
and find that it's not set in the centre, you need to re-steam it for the whole hour PLUS the extra time. Remember that the whole cake has to reheat back up before the centre will cook, so "just steam it for another 20 minutes" is not gonna work. If the centre didn't cook when you steamed it for an hour, it's not gonna cook in 20 minutes!
- Watch the video before making. It is a fussy process, so I recommend watching the whole video below to make sure you've got the process down.
Related Recipes
Watch The Full Video Tutorial!
All my recipes come with step-by-step video tutorials with extra tips not mentioned in the blog post, so make sure you watch the video below to ensure success - and if you enjoy the show, please consider subscribing to my YouTube channel. Thank you!
Description
Note: Make sure you plan in advance and soak your dried products at least 3 hours before making, especially if using scallops which take longer to rehydrate. I like to soak them the day before, and I keep them in the fridge. If using only mushrooms and dried shrimp, one hour of soaking should be enough time.
- 1
link (~40 g) Chinese sausage, diced
- 2 Tbsp
dried shrimp
- 12
- 15
g dried shiitake mushrooms (~3 pc)
- 20
- 25
g dried scallops, optional
- 1 cup
hot water
- 750g
daikon (unpeeled weight, note)
- 130 g
rice flour
- 1 Tbsp
+ 1 tsp
tapioca starch
- 1 tsp
sugar
- ¼ tsp
table salt (see note)
- ½ tsp
ground white pepper
- 2 Tbsp
oil
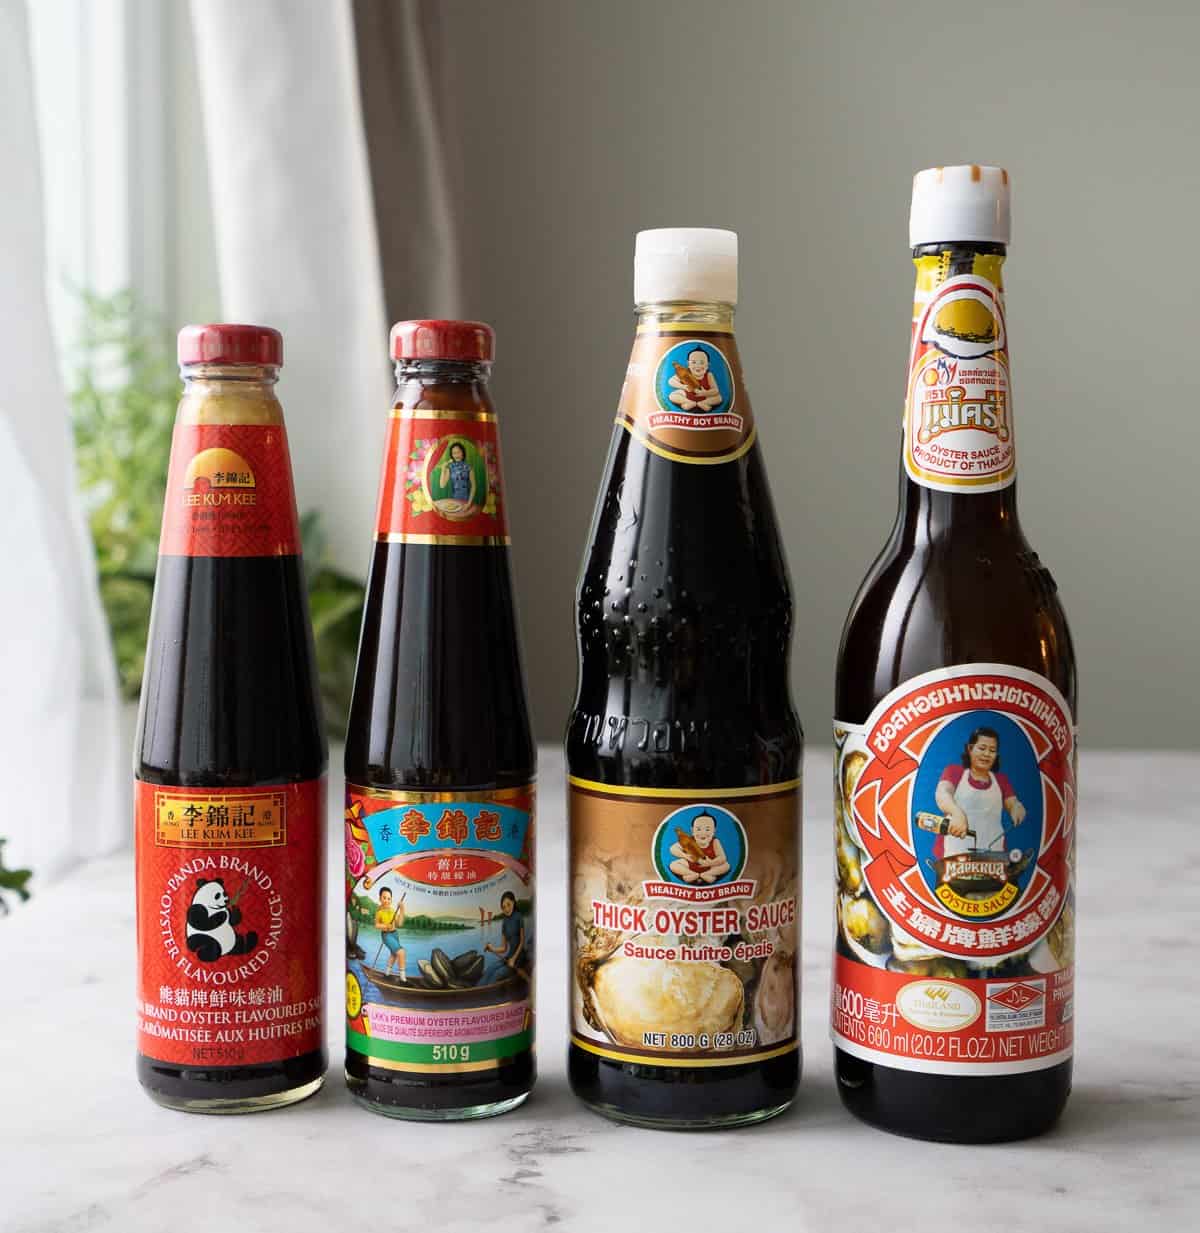
- For serving: soy sauce and hot sauce (A Thai-style Sriracha which is a little sweeter works really well for this)
- Tools: A 6- or 7- inch round cake pan, a loaf pan or another mold(s) of your choice.
Notes:
- Do not eyeball the amount of daikon, please actually weigh it (with peel). It's essential to getting the right texture for the cake.
- If you're omitting dried shrimp or Chinese sausages, you will need to increase the salt slightly.
- At least 2-3 hours in advance: rinse scallops, dried shrimp and dried mushrooms under cold water quickly, then soak them all together in 1 cup of hot water until scallops are fully hydrated and can be easily shredded by hand. Scallops the size I used in the video took about 3 hours, but if not using scallops, mushrooms and shrimp will take no more than 1 hour to soften.
- Drain the dried products and reserve all of the soaking water.
- Shred scallops with your fingers into strings, removing the little piece of chewy muscle that's attached on the side of the scallops.
- Remove stems from mushrooms then finely dice.
- Roughly chop dried shrimp.
- Peel daikon and shred into juliennes either with a knife, a julienne peeler, or you can also grate it using the largest holes on the grater.
- In a wok or a large heavy-bottomed pot, add Chinese sausage and cook over medium-low heat to render out fat. If sausage is too lean and there isn't much fat coming out, you may need to add a bit of oil. Keep cooking until the sausage pieces are browned slightly.
- Add mushrooms, scallops and dried shrimp and saute over medium heat for about 3 minutes until aromatic. Remove from wok.
- Add daikon to wok and toss it over medium high heat until wilted slightly. Add mushroom/seafood soaking water; if there is a bit of grit in the soaking water, be sure to not pour that part in. Toss the daikon around until wilted, then cover and cook over medium heat for about 7-10 minutes, stirring occasionally, until fully cooked and soft.
- Drain cooked daikon through a mesh sieve or a colander, pushing out as much liquid as possible, reserving the liquid. Put drained daikon back into the wok, off heat.
- Measure daikon cooking liquid and you want to have about 1 cup. If there isn’t enough, add cold water to make up the volume. If there is too much (there should not be that much extra), discard the excess. Let the liquid cool slightly just until it's warm.
- Meanwhile, add mushroom mixture to daikon in the wok (heat still off), along with sugar, salt, pepper and oil. Toss to mix well.
- Once daikon juice is warm, whisk in rice flour and tapioca starch until there are no more lumps. Add this flour slurry into the daikon mixture and toss to mix well.
- Turn the heat on medium and keep tossing, scraping the bottom, until the mixture is thickened into a paste. Remove from heat.
- Grease your pan generously with oil, and if you want the whole thing to come out easily in one big piece, line the bottom with parchment paper. Add the daikon mixture to the pan and even out the surface.
- Steam the cake for 1 hour over boiling water, making sure there is PLENTY of water in the steamer to last the hour. Tip: If your steamer has metal or glass pot lid, shield the daikon cake loosely with a piece of aluminum foil to prevent condensation from dripping onto the cake, or wrap the lid in a tea towel to help catch the drips. If using a bamboo steamer, there’s no need to do this.
- To test doneness, use a thermometer and you want a minimum of 200°F internal temp. Or you can use a wooden skewer to poke the center, and if stuff that comes up is translucent and not pasty white, it’s done. If making a bigger pan, or a larger batch with multiple pans, you may need to steam for longer.
- Let cool completely, or chilled, before cutting. You can keep the daikon cake in the fridge, for about a week, and slice it up to fry whenever you’re ready to serve.
To serve
- Run a knife around the mold to free it from the sides, then flip it out onto a cutting board and cut into desired size (preferably no more than 1-inch thick).
- Pan fry them over medium heat in a little bit of oil in a nonstick pan or a well-seasoned wok until hot throughout and browned on both sides.
- Serve with soy sauce and hot sauce (like Sriracha) on the side. A sweeter Sriracha, like a Thai style one, works better for this recipe I find. Enjoy!


 Pin Recipe