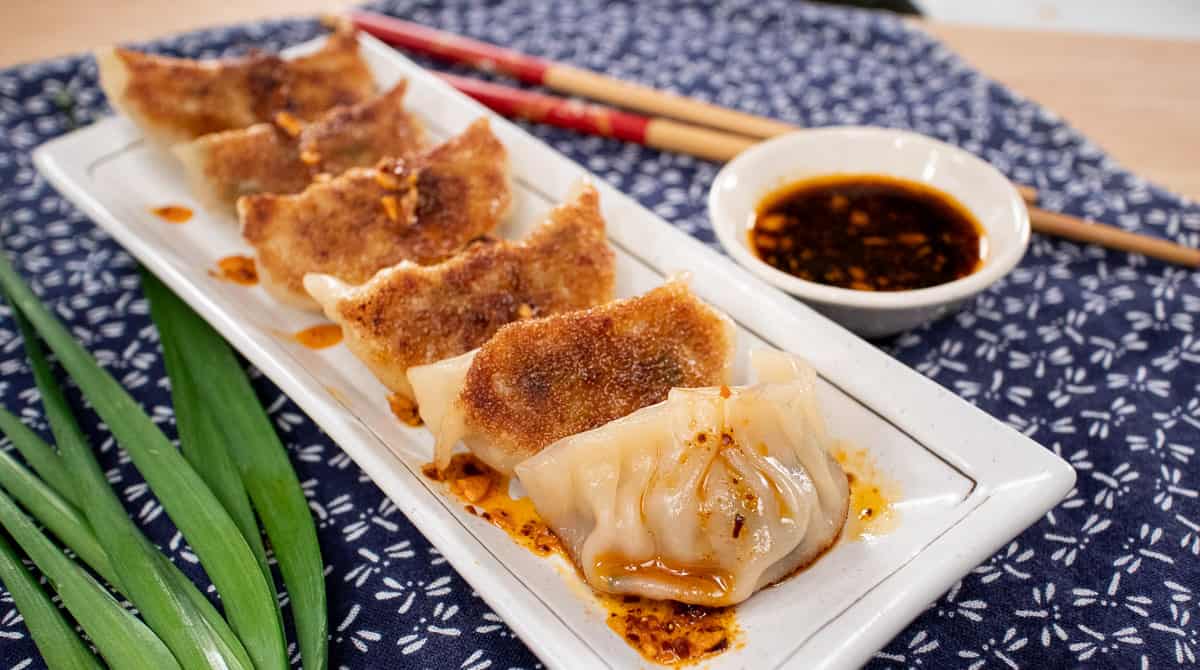
Whether you call them potstickers, gyoza, or just dumplings, one thing for sure is they are awesome. These are more of a "gyoza" because of the flavours used. The filling is a classic pork and cabbage (the best kind, IMO), but read on and I'll share many secrets to making the juiciest, most delicious filling that will beat any restaurant.
Secret #1: Key to Juicy Dumpling Filling
The most important factor for a juicy filling is the fat content of the ground pork
. There is little you can do if you're starting out with pork that is too lean.
Many Western grocery stores will only carry lean ground pork, so check out Asian grocery stores with a butcher counter. They should have "regular" ground pork that is fattier.
If you have access to ground pork with different fat content percentages in your country, shoot for 25-30% fat
. For reference, lean ground pork in Canada has a maximum of 17% fat, and regular ground pork is max 30% fat.
Secret #2: How to Keep ALL the Flavour In
Many recipes will ask that you salt the cabbage to draw out moisture, or boil them, and then squeeze the daylight out of them to get rid of excess liquid. That's fine, but you lose a lot of that sweet napa cabbage flavour (and yes, I prefer napa for flavour and tenderness) and not to mention nutrients!
I came across a technique from Lisa Lin of Healthy Nibbles, where she sautés the cabbage
so that in the process of removing the liquid, the flavour gets concentrated rather than removed. Brilliant! And it really does make a difference.
This also gives you a chance to saute the garlic, ginger, and pepper along with the cabbage, which further enhances the flavour rather than just adding them in raw.
Secret #3: How to Keep ALL the Meat Juice In
Starch! When meat cooks, muscle fibers tighten and the juice gets squeezed out. We all know this by experience of cooking burger patties. The little bit of added cornstarch or tapioca starch
helps absorb and retain this juice inside .
When you go to cook the filling to taste, you will see that very little juice comes out.
Secret #4: How to Add Extra Umami
Dashi powder!
Also called "hon dashi" it's a Japanese fish stock powder, and a staple ingredient in Japanese households. It adds extra umami and those iconic Japanese flavours that come from bonito flakes and kelp. This is my secret weapon, which I've also used in my garlic fried rice recipe.
Secret #5: Getting the Right Texture
You don't want to just mix the meat, you want to knead it
for a period of time. This develops the protein and make the filling smoother and "bouncier", as opposed to having that coarse burger patty texture.
Secret #6: Serve it With This
Honestly, these are so flavourful you do not need to serve them with any condiment, though I do think that they benefit from the simple soy-vinegar dipping sauce to balance the richness. But for MAX flavour, I highly recommend serving them with "rayu"
or "layu", which is Japanese chili oil with crispy garlic, sesame oil, and other delicious seasonings in it. If you've never had this, try it and you'll want to put it on everything! Check it out on Amazon here.
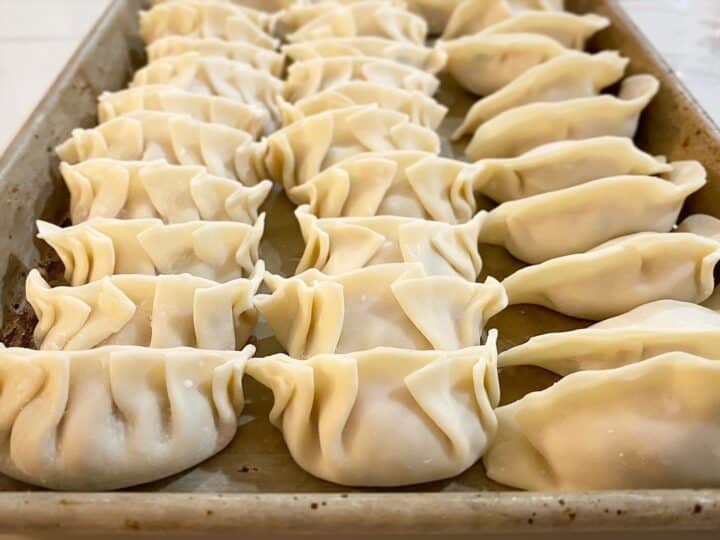
Pleating Dumplings: Easier Than You Think
First, pleating dumplings is MUCH easier than it looks. First time I did it I was so surprised how intuitive it felt. Watch the video for different ways to wrap dumplings; including the super-fast, no-pleat way.
To Pleat or Not to Pleat
Dumplings with 8 pleats, 6 pleats, and no pleats.
In the video I show you how to make dumplings with no pleats and lots of pleats. If you're not concerned about looks, here are some things to consider:
Pros of not pleating:
Way less work, obviously, but you also only need to wet one side of the wrapper.
You can put more filling in and make bigger dumplings with higher meat-to-wrapper ratio. Bigger dumplings = fewer dumplings = even less work.
With no folded parts, the wrapper remains thin all throughout the dumpling. This makes a difference if your dumpling wrapper is on the thicker or chewier side.
Cons of not pleating
:.
They won't naturally form the crescent shape, so you have to make sure you follow the method shown in the video to make that curve. The crescent shape is important for creating that crispy bottom—if you just fold over the wrapper into a semi-circle, they won't sit up well for browning.
Frequently Asked Questions About Dumplings
Can I use chicken or beef for dumpling filling?
Yes, but again the important part is keeping the fat content high. If you want to do chicken or turkey, use dark meat, not
white meat. You can also use ground beef but it will have a strong and quite different flavour.
Is it better to use store-bought dumpling wrappers or homemade?
You can take the time to make the wrapper, but I personally don't think there's much benefit apart from the joy of making things from scratch. I don't think homemade ones are necessarily "better", and if anything it might not be as good as the store bought ones if you're not experienced in making them.
However, when you wrap using homemade wrappers you don't have to wet the edges, which will make the wrapping process go a bit quicker.
What I would recommend instead is to try a few brands of wrapper to find the one you like best, because they are all a little different - some chewier than others, some thicker, some thinner.
Can I wrap dumplings in advance?
Yes and no. You CAN wrap them in advance but then you have to freeze them. If you wrap them and put them in the fridge, eventually the moisture from the filling will turn the wrapper soggy! Remember the wrapper is still raw, and so it will eventually "dissolve" if exposed to moisture long enough.
How do I freeze dumplings?
Freeze them on a flat tray without touching each other so they don't stick together. Line the tray with parchment paper otherwise they will stick to the tray. If you forget and they DO stick, you can use a flat spatula to pry them apart.
Once frozen, you can consolidate them into a freezer bag or container.
How do you cook frozen dumplings?
Do NOT thaw them. You can cook frozen dumplings using the exact same method as non-frozen ones, they just take a few minutes longer. If using the "water frying" method, they will take about 5-6 minutes after adding the water.
What are some other ways to cook dumplings?
In this recipe I use the "water frying" method which gets the bottom crispy. But for a lazy meal you can simply boil them and toss them in some chili oil and/or garlic oil. You can also steam them.
Watch The Full Video Tutorial!
All my recipes come with step-by-step video tutorials with extra tips not mentioned in the blog post, so make sure you watch the video below to ensure success - and if you enjoy the show, please consider subscribing to my YouTube channel. Thank you!
These have a juicy, umami filling, and are cooked using the "water frying" method for crispy bottoms without needing to boil a pot of water!
Ingredients
1 tsp
white peppercorns
4
cloves garlic
2 tablespoons
chopped ginger (~1-inch piece)
250g
napa cabbage (~ 3.5 cups
chopped)
½ tsp
table salt
1
lb (450g) ground pork (preferably not lean)
1 tsp
toasted sesame oil
1 ½ Tbsp
soy sauce
1 ½
tsp dashi powder (optional; if not using add 1 tsp
more soy sauce)
2 tsp
sugar
1 Tbsp
tapioca starch or cornstarch
½ cup
chopped garlic chives or 3
finely chopped green onions
1
package dumpling wrappers ( 40
- 50
pieces)
Dipping Sauce
(This amount below is per person as you want everyone to have their own bowl do they can double dip. Scale up proportionally according to the number of people.)
2 tsp
rice vinegar
2 tsp
soy sauce
Optional: A pinch of sugar (Thai people like to add this to lessen the sharpness of the vinegar)
Optional: A little drizzle of rayu(Japanese chili garlic oil, highly recommend!) or another chili oil of your choice
Separate the white and green part of napa cabbage leaves. Finely dice the white "stems" and finely chop the leaves, keeping them separate.
In a mortar and pestle pound peppercorns until fine. Add garlic and ginger and pound into a fine paste.
In a wok or a large skillet over medium heat add a tablespoon of oil and the garlic paste. Saute until aromatic; about 2 mins.
Add napa cabbage STEMS ONLY and turn the heat up to medium high. Add ¼ tsp of the salt and cook until soft and translucent; about 4-5 minutes.
Add the cabbage leaves and cook for another 2-3 minutes until wilted and there’s no pooling liquid. Remove from heat and spread it all out on a plate to cool quickly.
While the cabbage cools, combine pork, the remaining ¼ tsp salt, soy sauce, dashi powder, sesame oil, tapioca starch, and sugar, and knead with your hands (I'd wear a latex glove) for at least 5 mins. After kneading it should look smooth and pasty.
Add the cooled cabbage and garlic chives and mix gently using a "fold and squish" action just until the vegetables are evenly distributed.
Cook a little bit of filling in the microwave to taste so you can adjust the seasoning if needed. (If you follow the measurements exactly, you won't need to adjust, but it's good habit to ALWAYS taste anything that can't be fixed after cooking, because you might have forgotten something!)
Wrap the dumplings: Using a dessert spoon, scoop up a spoonful of filling (about 1 ½ Tbsp) per piece. Watch the video for how to wrap.
If you're not cooking them right away, freeze them immediately. Do not wrap and let them sit unfrozen for any longer than a couple of hours. (See FAQ above for more details and how to properly freeze dumplings.)
Mix together the dipping sauce before you start cooking so it'll be ready.
Cook the dumplings:
In a nonstick skillet (or a well-seasoned cast-iron pa), add a little oil to thinly but thoroughly coat the bottom. Turn the heat on to medium high, and without waiting for the pan to get hot, go ahead and arrange the dumplings on the pan in a circular pattern. You can pack them pretty close together and fill the pan completely, but not so much that they are squished.
Fry the dumplings for about 3-5 minutes or until the bottoms are well browned.
Turn the heat down to medium and add about ¼ cup of water (it will splatter) and then close the pan with a tight fitting lid. Steam for about 3 minutes (5 mins if cooking from frozen) until cooked through. I like to use an "instant read" thermometer to check doneness, and I'm going for an internal temp of 160°F minimum.
Once done, you can either use tongs to arrange them on a plate, OR if you're fancy, you can put a plate upside down on top of them pan and flip the whole pan onto the plate and serve the dumplings crispy side up. Just be quick and confident when you flip!
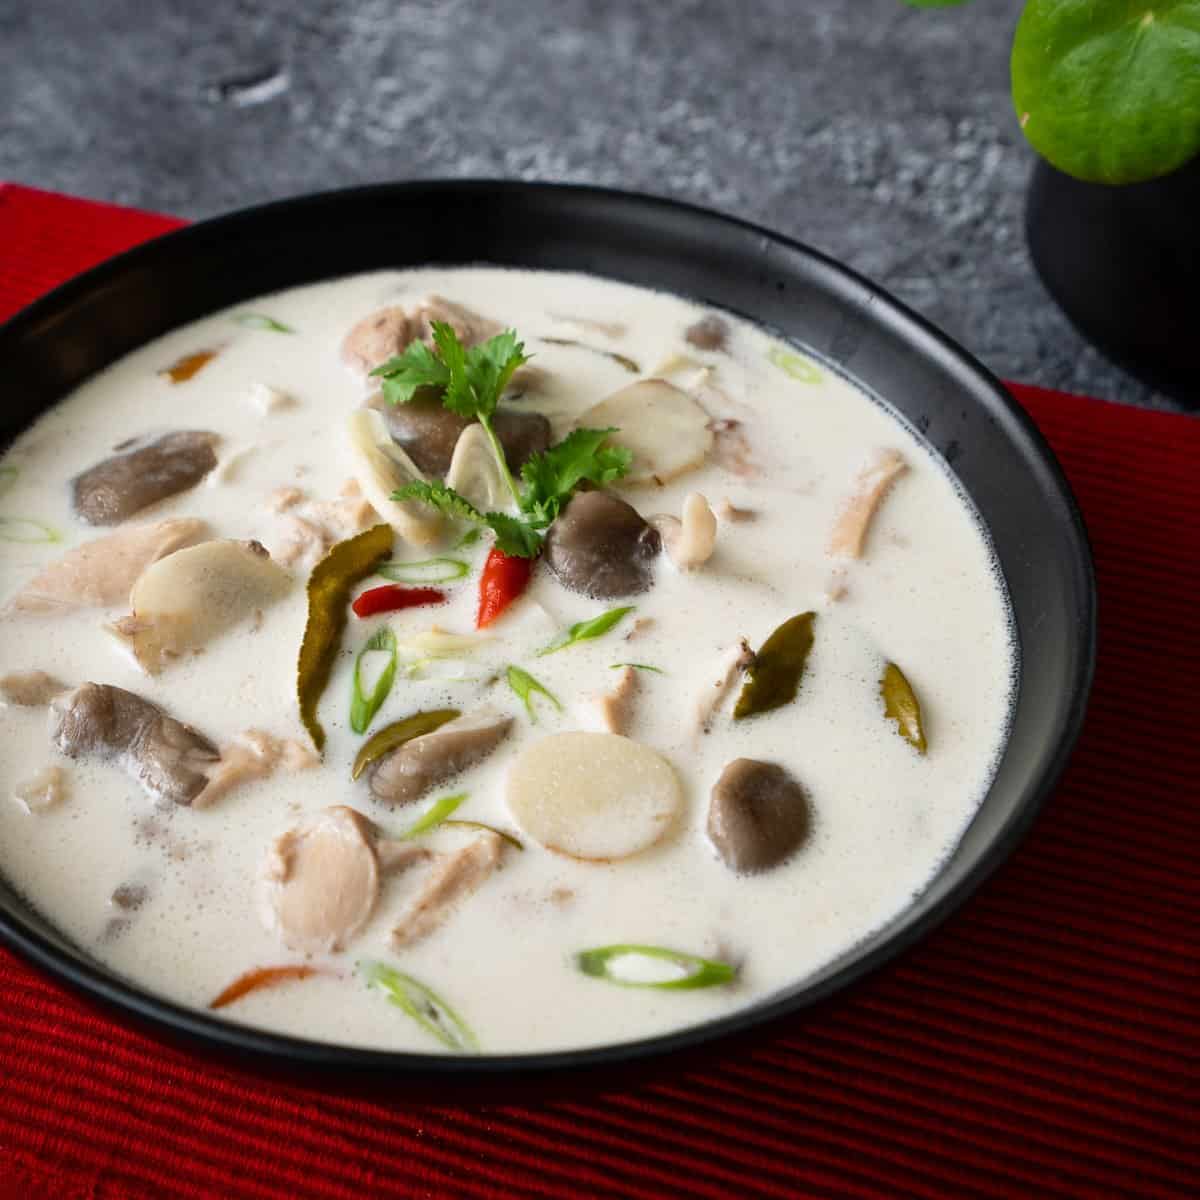
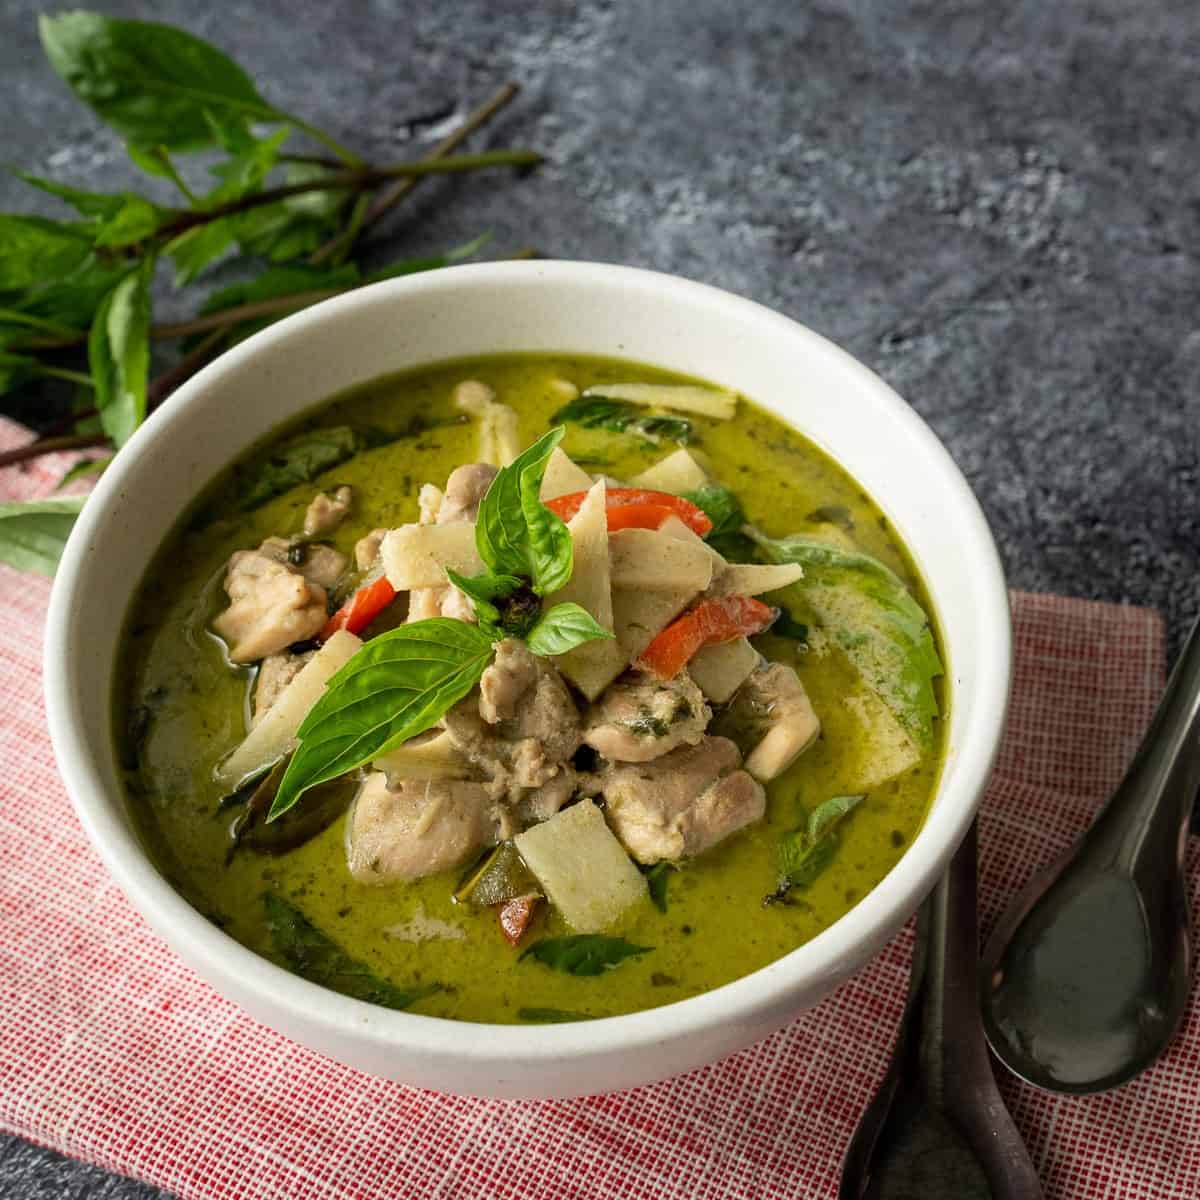
Tom yum goong maybe the most famous soup of Thailand, but its milder creamier sister, tom kha gai , is my personal favourite. This comforting Thai coconut chicken soup recipe is infused with the classic Thai herbs: lemongrass, galangal, and makrut (kaffir) lime leaves. It's so easy yet so loveable that when someone asks, "I'm new to Thai food, what should I try/make first?" Tom kha gai is my answer.
If you love mangoes, and you love mango desserts, Mango Royale, aka Mango Float, is an absolute must-try; right after mango and sticky rice , of course! It's a frozen Filipino dessert that takes advantage of peak-of-the-season mangoes, and uses only 5 ingredients. There's no baking involved, and it's so easy it's essentially fool-proof!
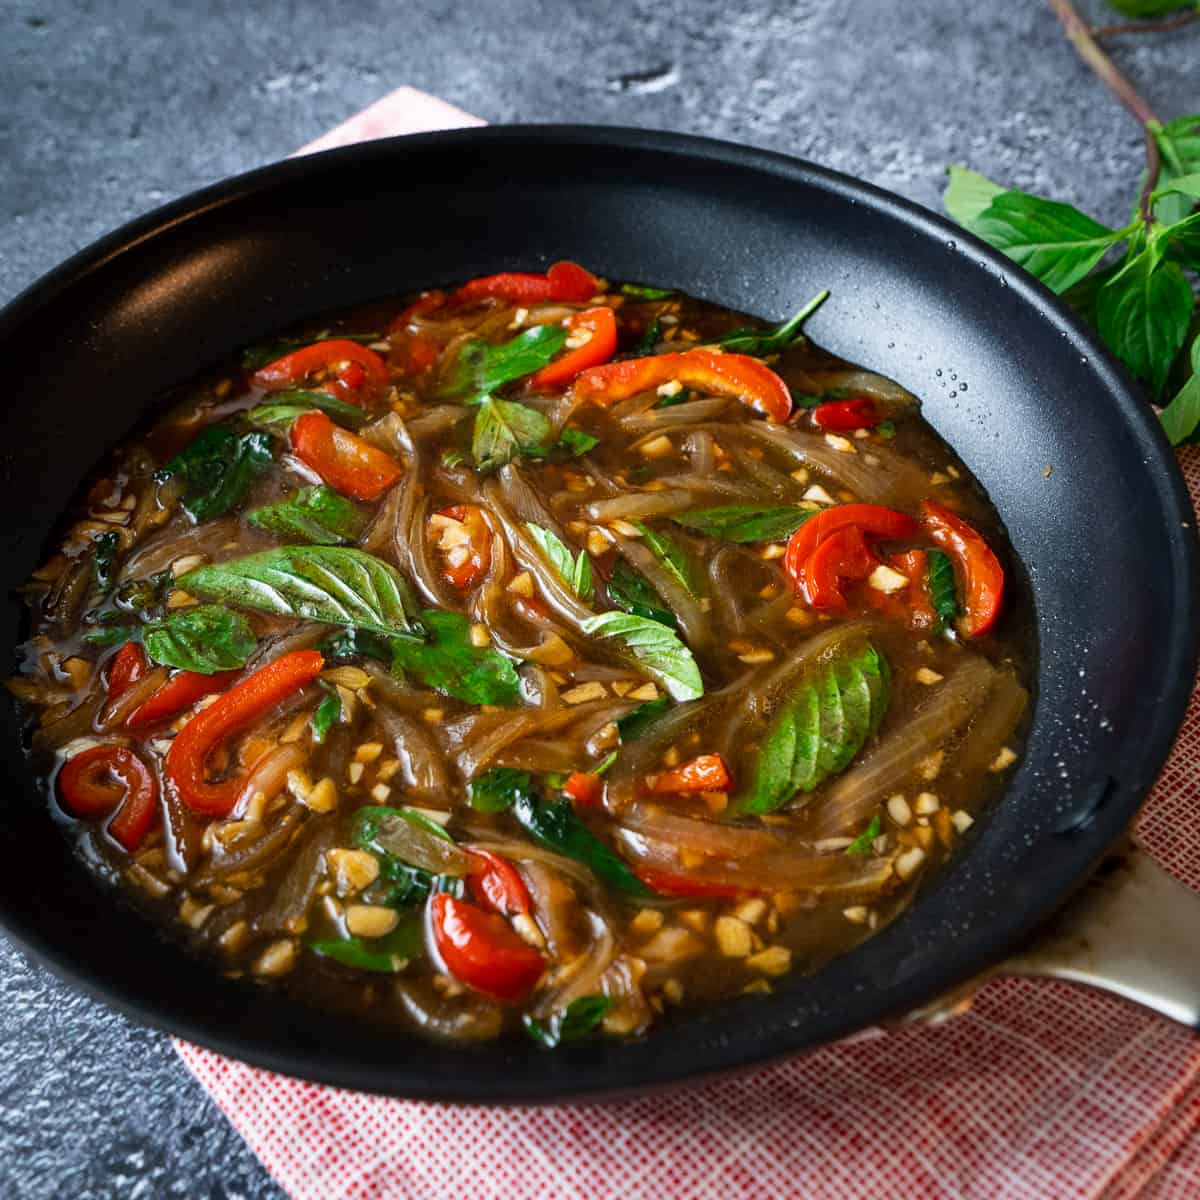
I LOVE all kinds of basil, but I don't love how quickly it goes bad and that it doesn't freeze well. So I came up with this recipe as a way to use up any amount of basil you have on hand . It's an easy and versatile sauce that only uses pantry staples, and can be stored in the fridge for at least a week. Reheat it and pour onto any cooked protein, or use it as a stir fry sauce - or heck, you can even use it as gravy for your mashed potatoes. It can also be made vegan. The possibilities are endless!
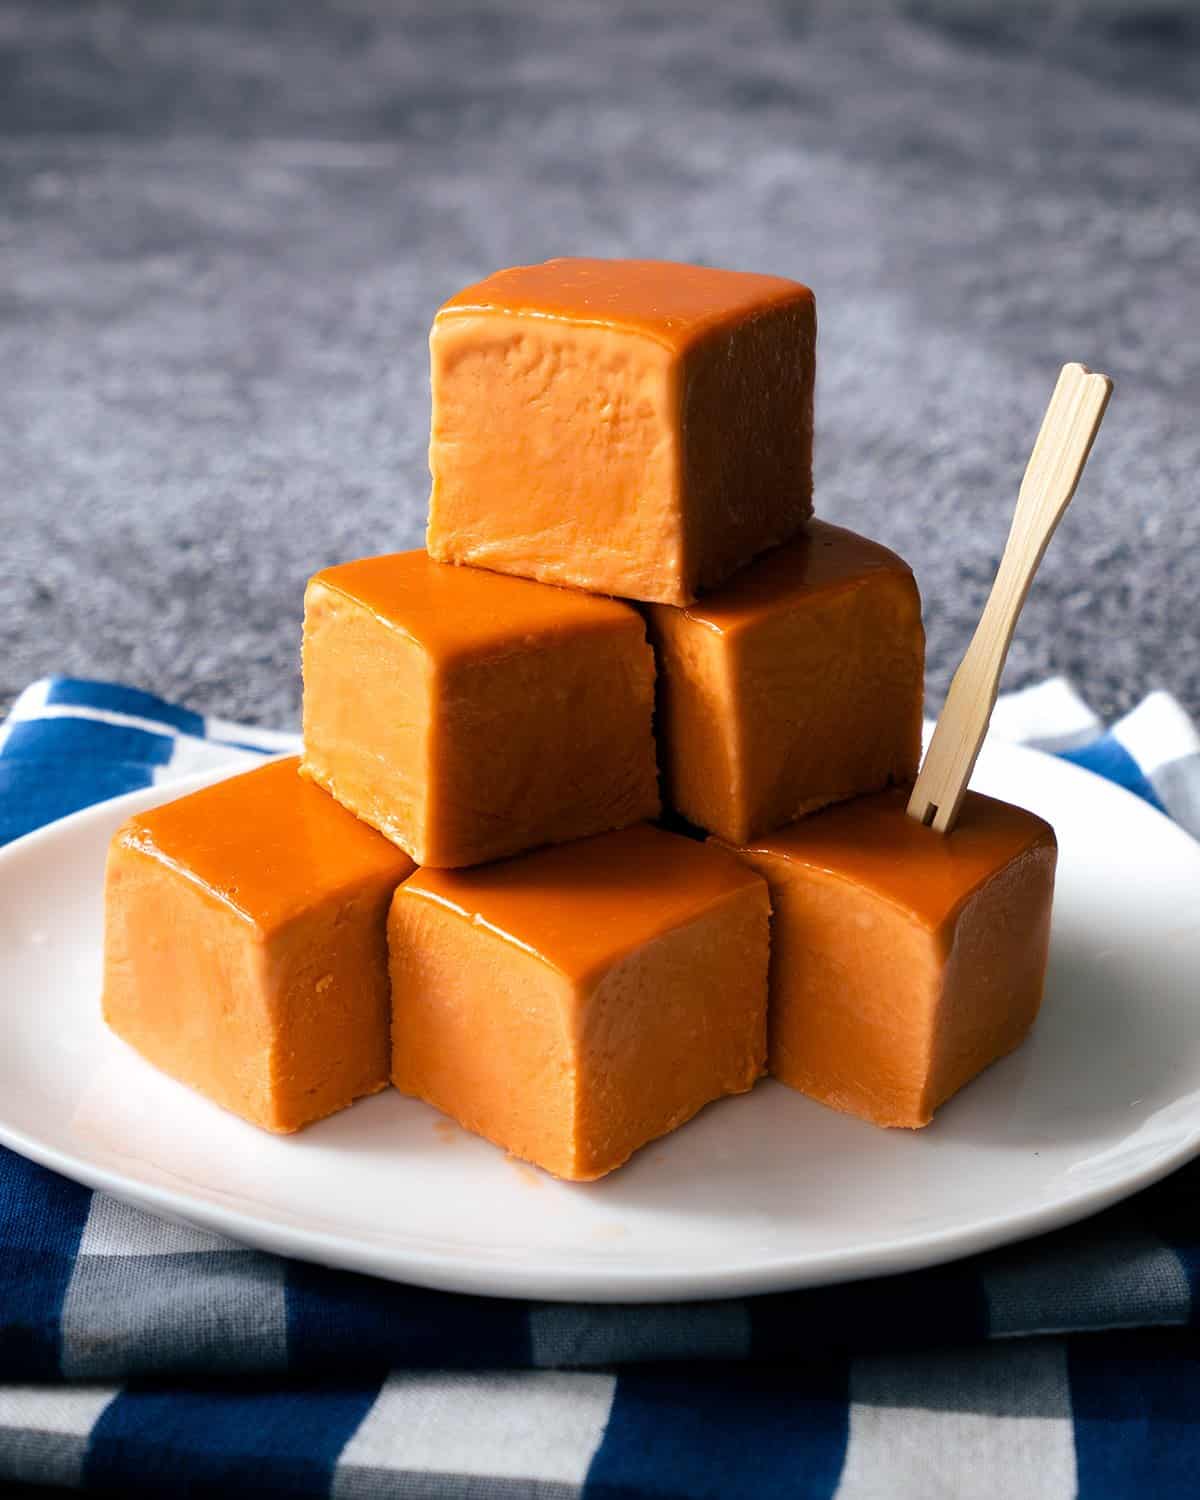
Imagine this: soft and creamy ice cream bars that you didn't need to whip or churn. All you have to do is cook the ice cream base, pour it into a mold, then cut it into pieces. And it's so soft your teeth will glide right through it as you take a bite, and it's wonderfully chewy. Yes, chewy.
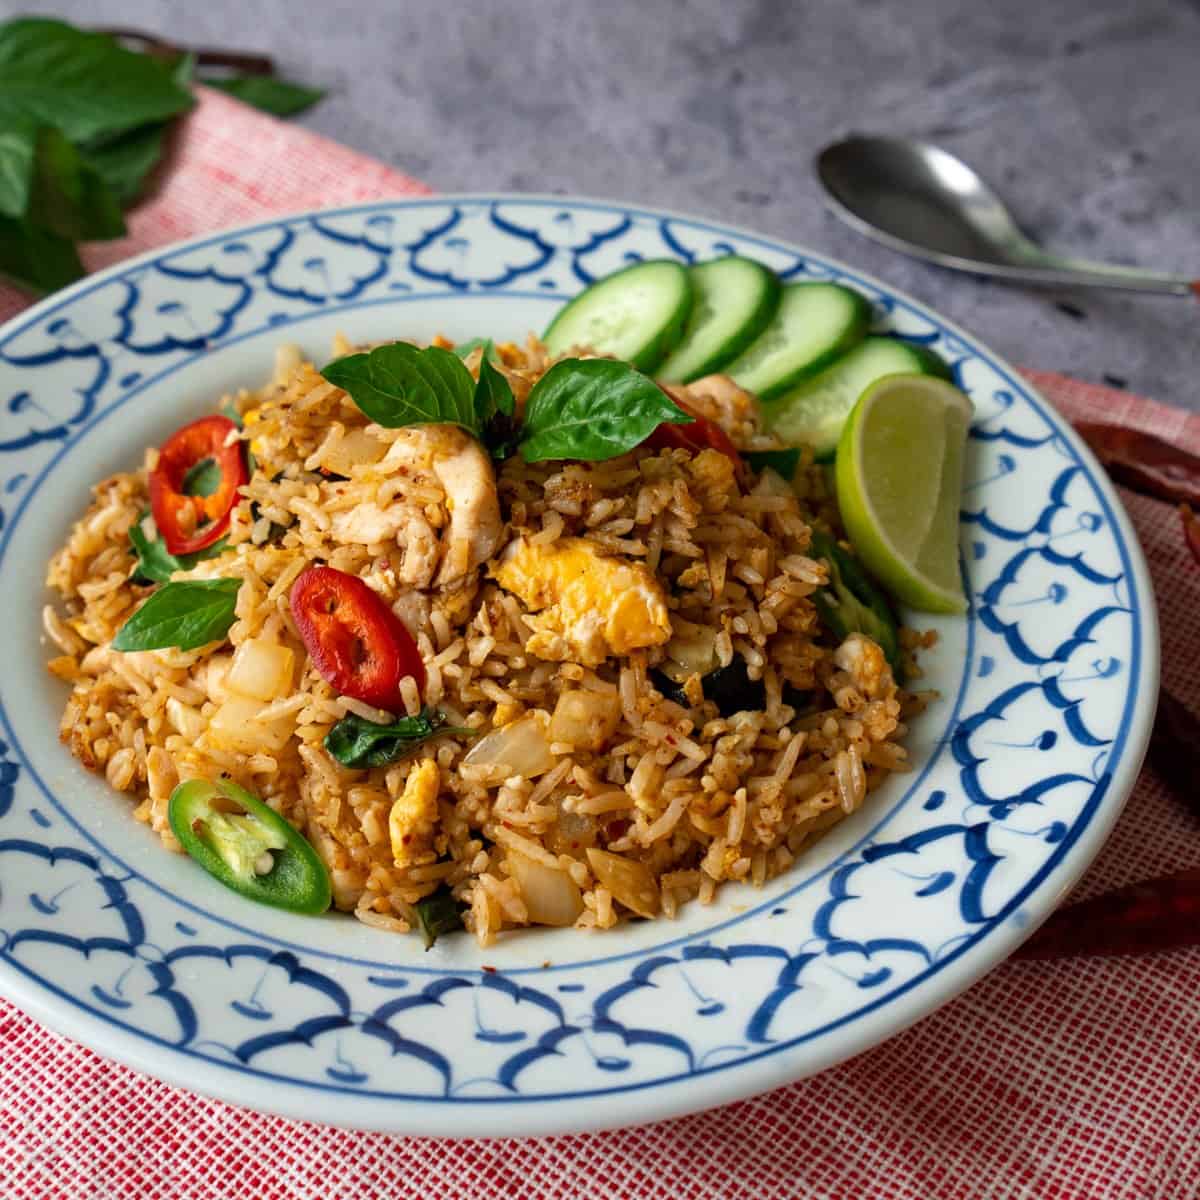
I wanted a fried rice recipe that really celebrates the flavours of chilies - not just their heat. This fried rice features not one, not two, but three different types of chilies, combined with the fragrance of Thai basil to tie it all together! And no, it doesn't make this dish overwhelmingly spicy, and you can indeed customize the heat level while still preserving all the delicious chili flavour. It's not something I created out of thin air, but a traditional Thai dish (with a couple of tweaks from me)!
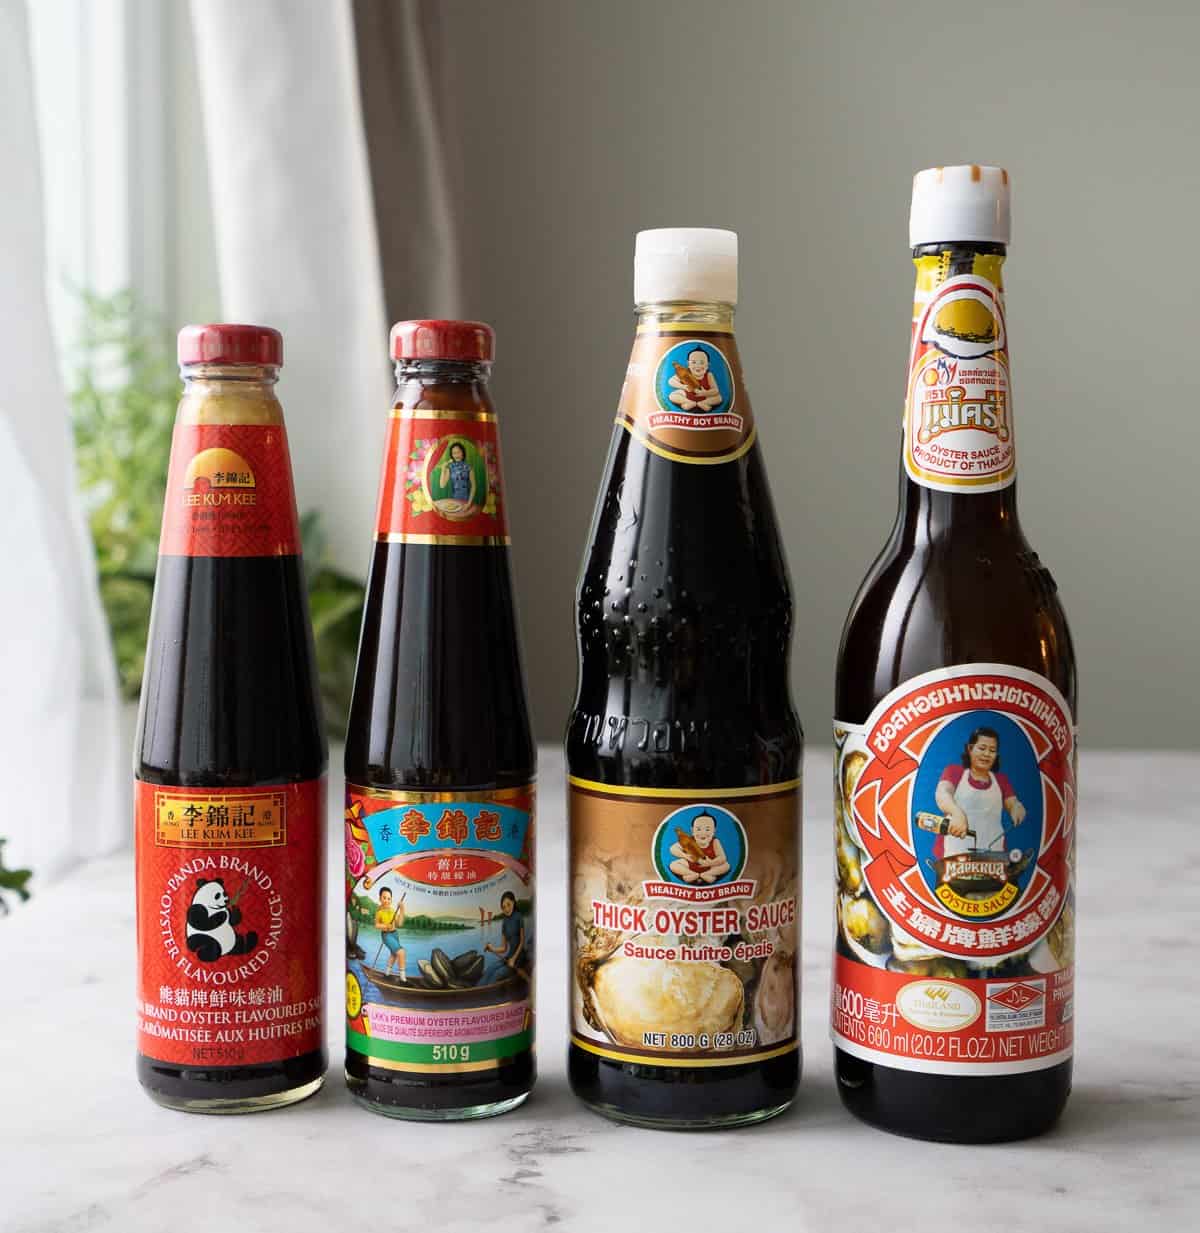
If you love cooking Asian food, oyster sauce is probably already in your kitchen. But do you know if the one you have is a "good one”? And is the expensive oyster sauce you bought (or didn't buy) worth the splurge?
With over 3 million views on YouTube, this recipe is one of the most popular, and an OG, on Hot Thai Kitchen. This world-famous tom yum soup is universally loved; and with this authentic recipe I promise you can make it as good as, if not better than, the ones in restaurants. It's one of the first dishes I learned to make as a child because it's so easy, making this a great first Thai dish to try!
Thai green curry chicken is my most popular recipe on the YouTube channel with over 4 million views . If you want a completely authentic recipe, and one that maximizes deliciousness, this is it right here. It is one of the best known dishes of Thai cuisine, and despite its complex flavours, it is actually quite easy to make at home. It's also gluten free, and adaptable for vegans!
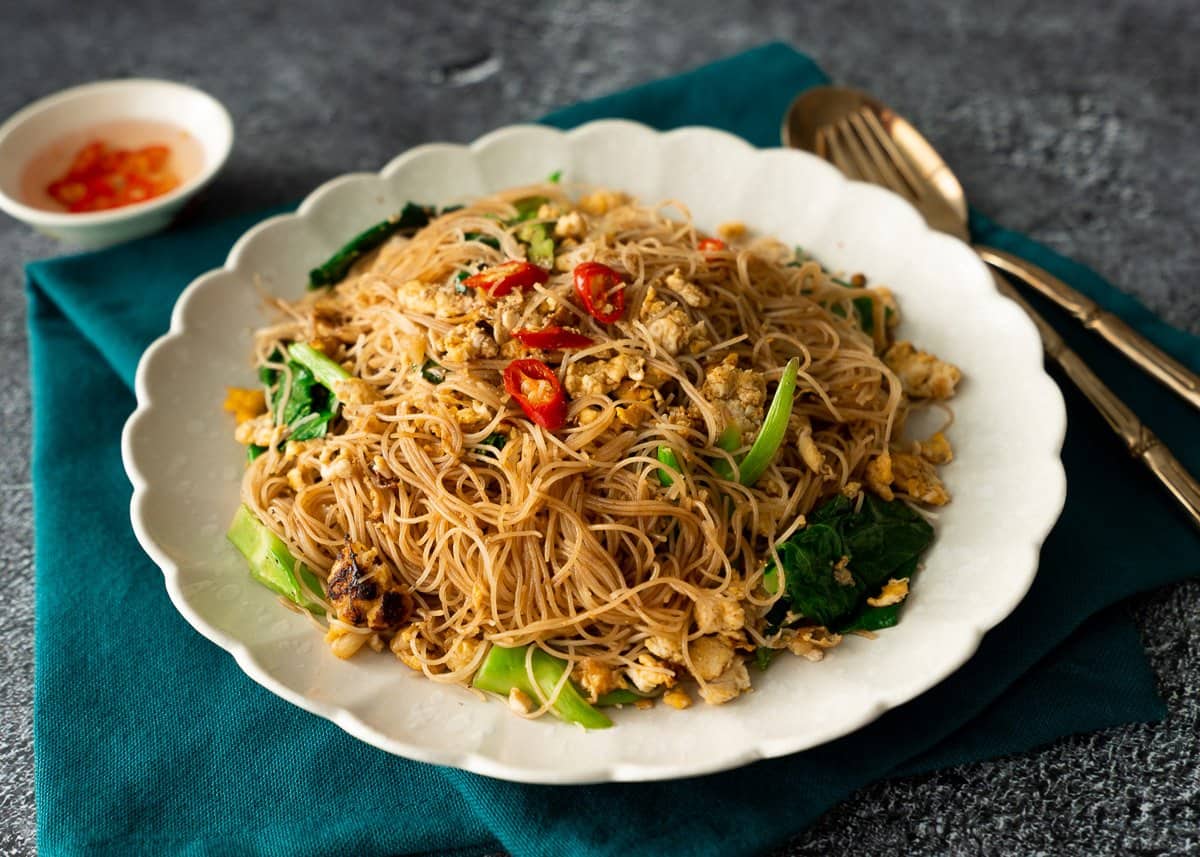
Pad see ew is one of the most well-known and well-loved Thai dishes, but most people only know of the more common version of pad see ew that uses fresh wide rice noodles (ho fun). This version however uses thin rice vermicelli, and it's the one that I actually grew up eating in Thailand. It’s an incredibly fast dish to make; from the time I get up to cook to the time I sit down to eat, it takes only 20 minutes! You can even watch me prep and cook it all up in real time in the video tutorial below just to see how fast it really is!
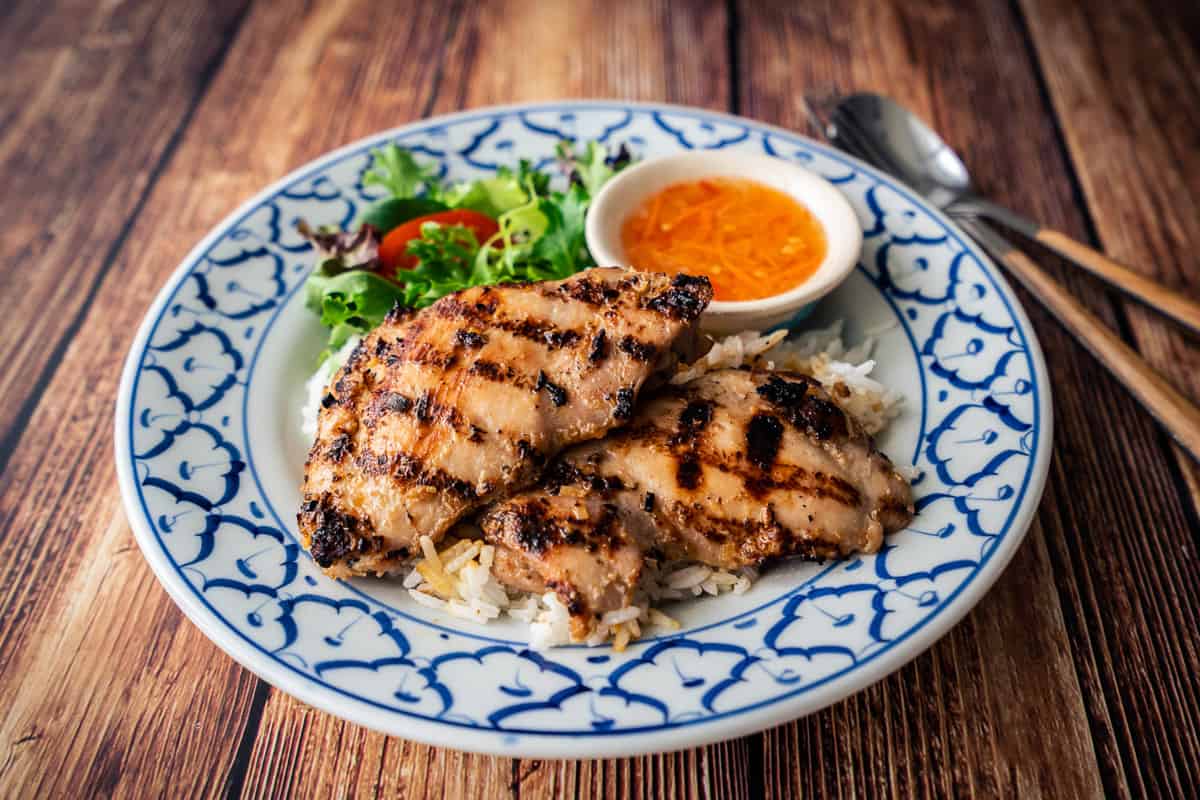
Easy, delicious, and versatile; what else could you ask for in a chicken recipe? Lemongrass chicken is a staple menu item in Vietnamese restaurants in Canada, and one that my husband gets all the time - which is why I was inspired to recreate it. It is so quick to prepare, kid-friendly, can last you the whole week in the fridge (yay meal prep), and you can grill or broil it!
We've been helping companies express themselves digitally for more than 20 years.